Overview:
The process of provisioning a guest virtual machine (VM) template in a cluster follows this pattern:
- Upload ISO files onto a Datastore
- Create a new VM
- Run the VM and proceed with the installation
- Convert the Live VM into a Template
- Deploy cloned VMs from the Template
- Optional: Convert Template to VM (to Apply Changes)
1. Uploading ISO to a Datastore
Select Storage Icon > click on Data Store where ISOs are stored
On the right side, click on the “Upload” button > browse toward the directory where local ISOs are stored
If this error occurs, follow its advise and navigate toward the URL to accept the private certs. Afterward, an uploading retry should succeed.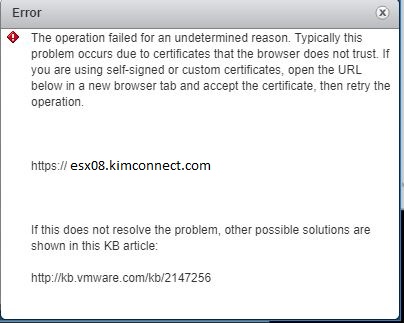
2. Creating a new virtual machine
Logon to vSphere Web Client using your provided credentials > hover mouse cursor over the “Home” icon click on “VMs and Templates”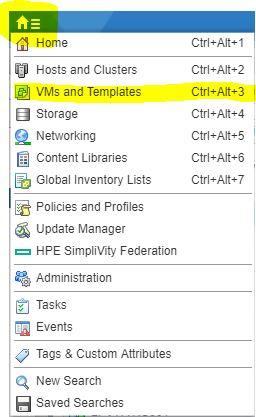
Right-click the “Templates” folder > select “New Virtual Machine”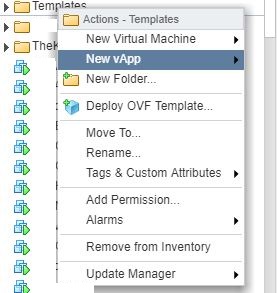
Follow the Wizard:
Select creation type: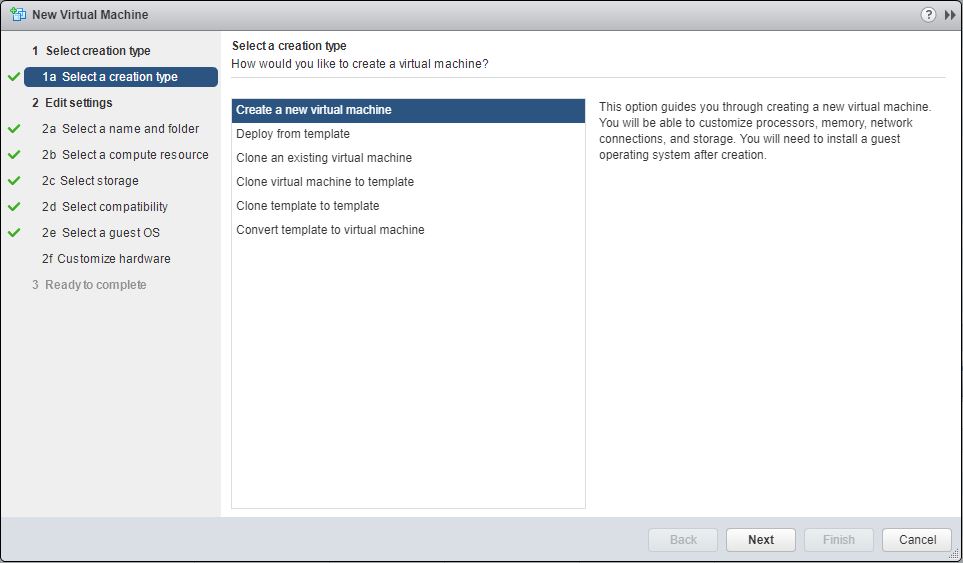
Select a name and folder: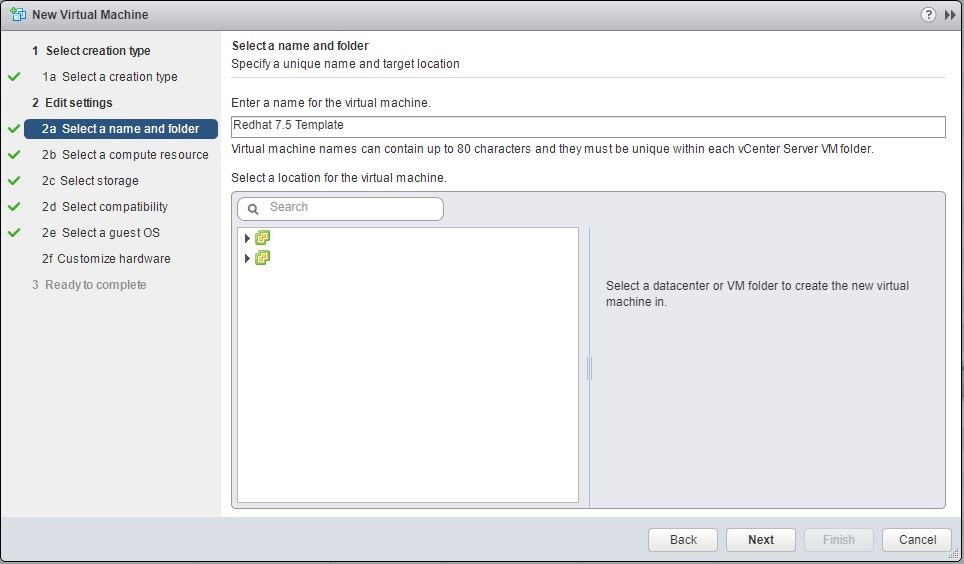
Select a compute resource: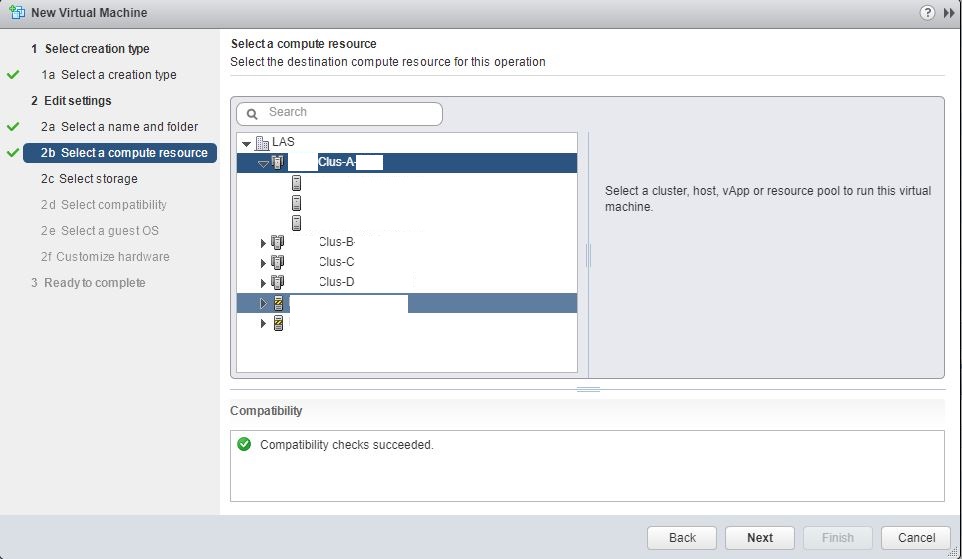
Select storage: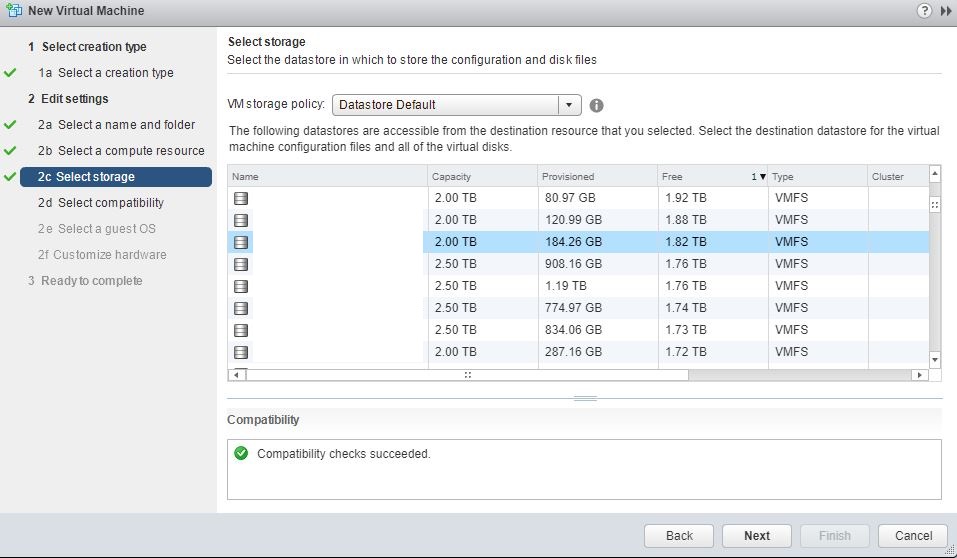
Select compatibility: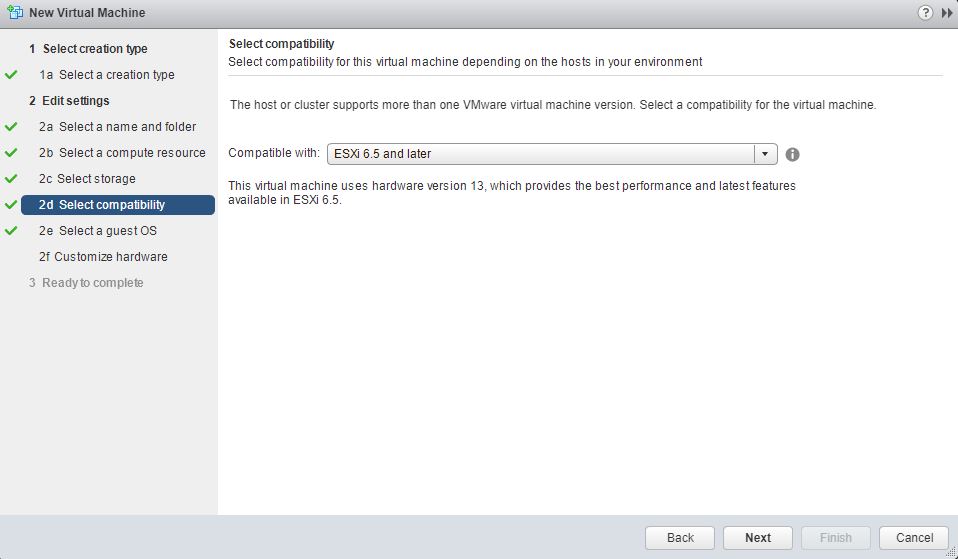
Select guest OS type: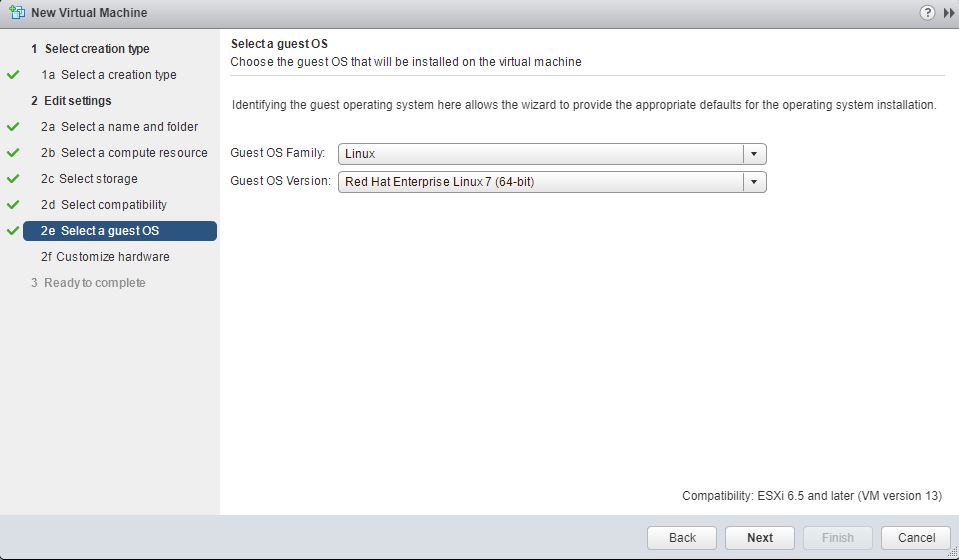
Customize hardware: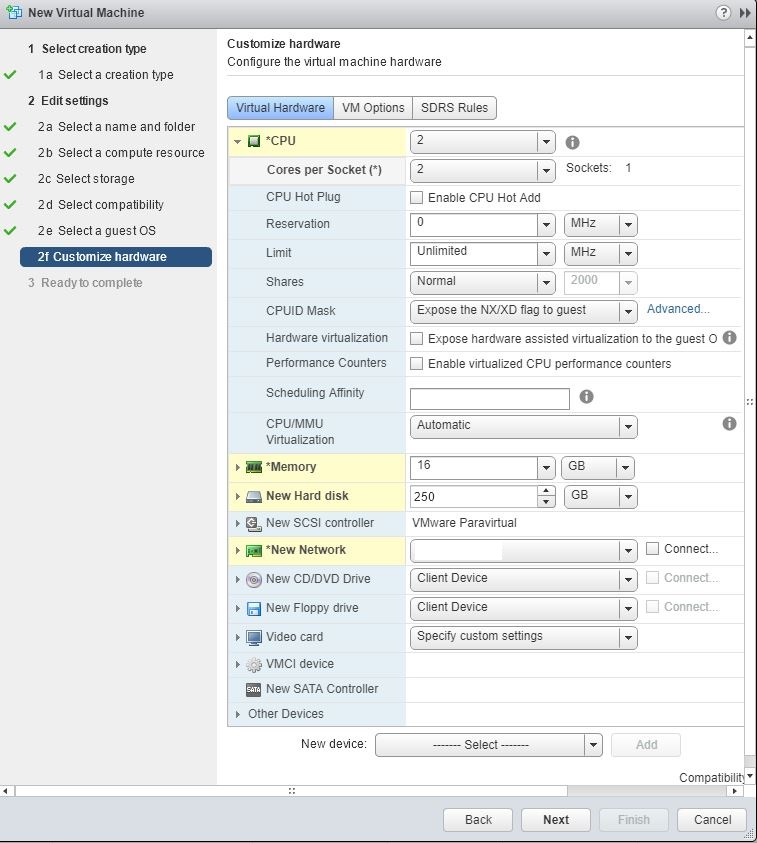
Ready to complete: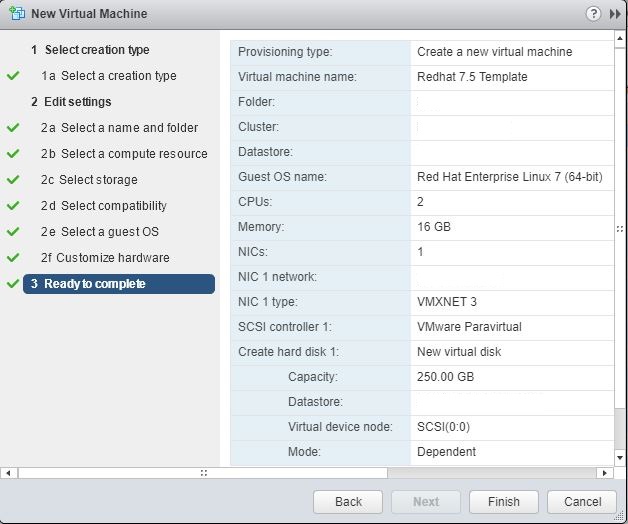
Verify task completion:
To remove the floppy disk and mount an ISO:
Locate the VM > right-click it > select Edit Settings…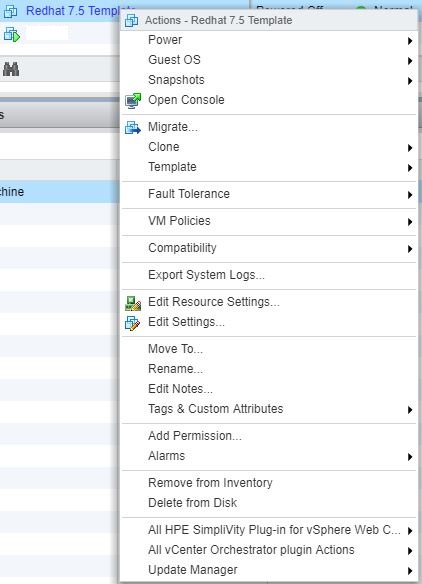
Click the ‘X’ button next to the Floppy Disk component to delete it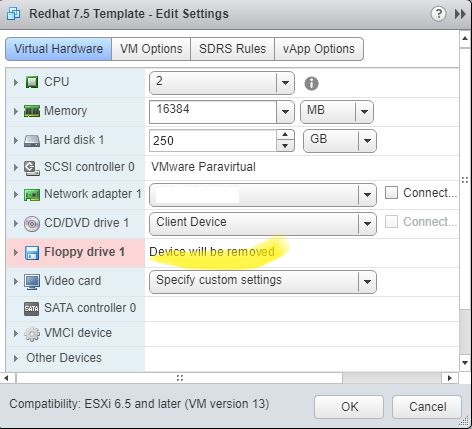
Click on the down-arrow on the right side of CD/DVD drive > select “Datastore ISO file” option
Find the correct DVD image and click OK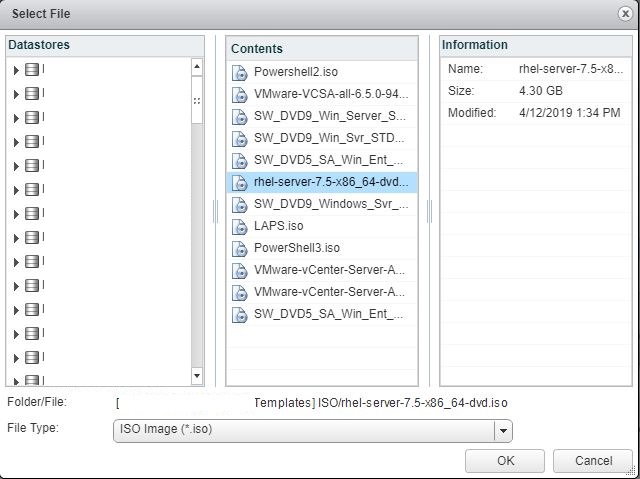
Put a check mark at the Connect… box > also put a check mark to Connect the Network adapter(s) > click Finish when done![]()
3. Installing Operating System (OS) on Guest VM
Search for the VM by typing its name inside the Search field > click on the appropriate result
Right-click the machine > Actions > Power On![]()
At the Summary tab, click on the Console View or Play button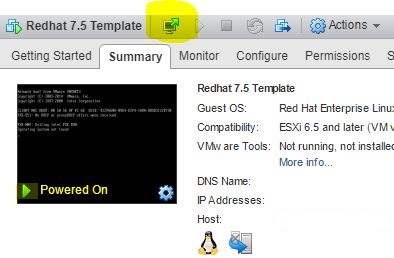
If the OS doesn’t automatically load, click on the “Send Ctrl+Alt+Delete” button
Follow these instructions for different versions of OS:
- Windows 2016
- Redhat 7.5
4. Converting VM into a Template
Locate the Guest VM > right-click > Template > Convert to Template > Yes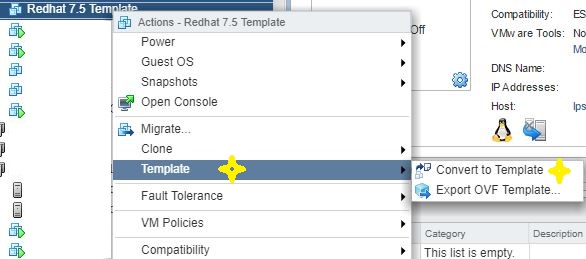
Click ‘Yes’ to confirm action
Check progress
Locate the converted entity (either using the Search function or navigating the VMs lists) > right-click the correct template > move > choose the “Templates” folder > OK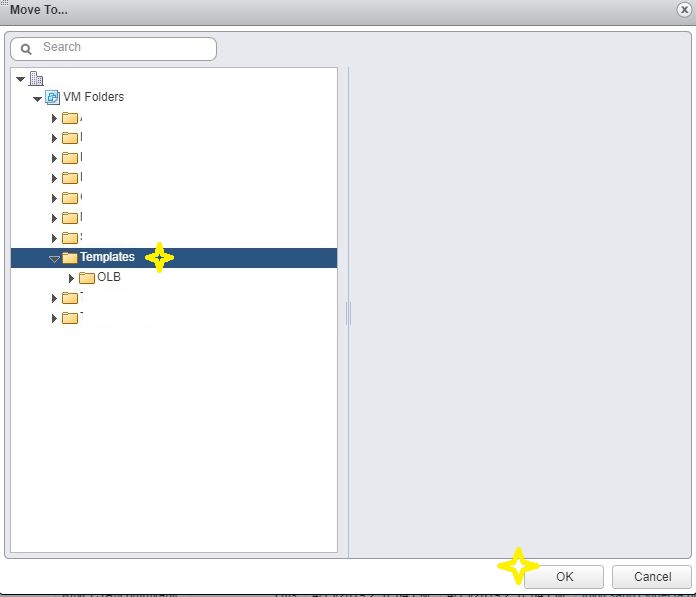
Verify that the newly created template has been placed in the expected location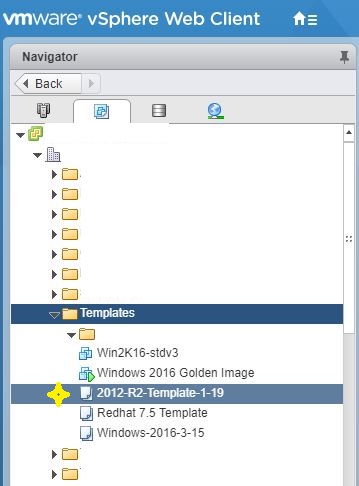
5. Deploying a VM from Template
Locate the desired template > right-click > select “New VM from This Template”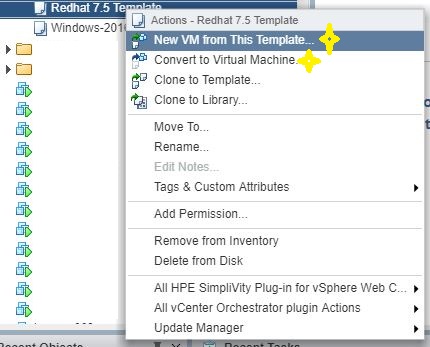
Follow the wizard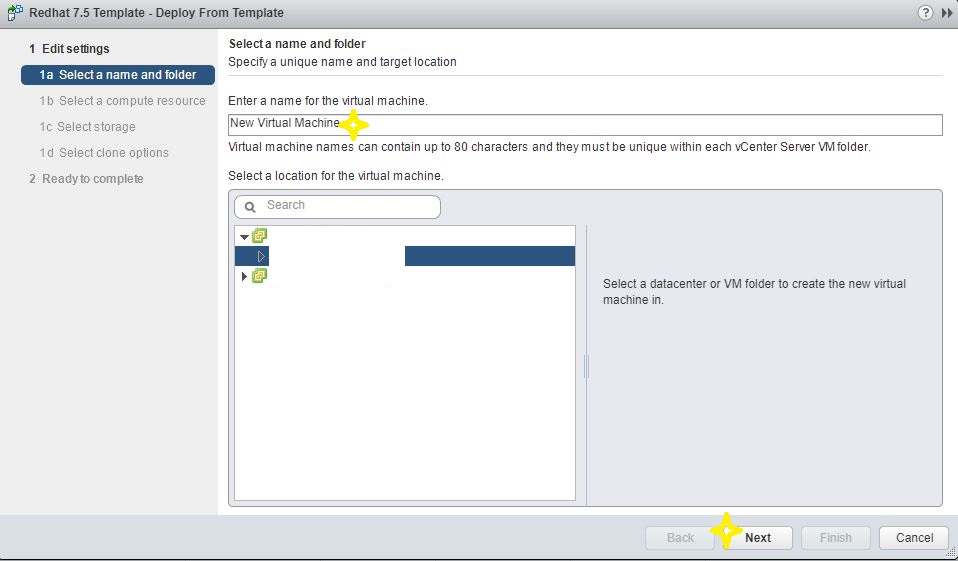
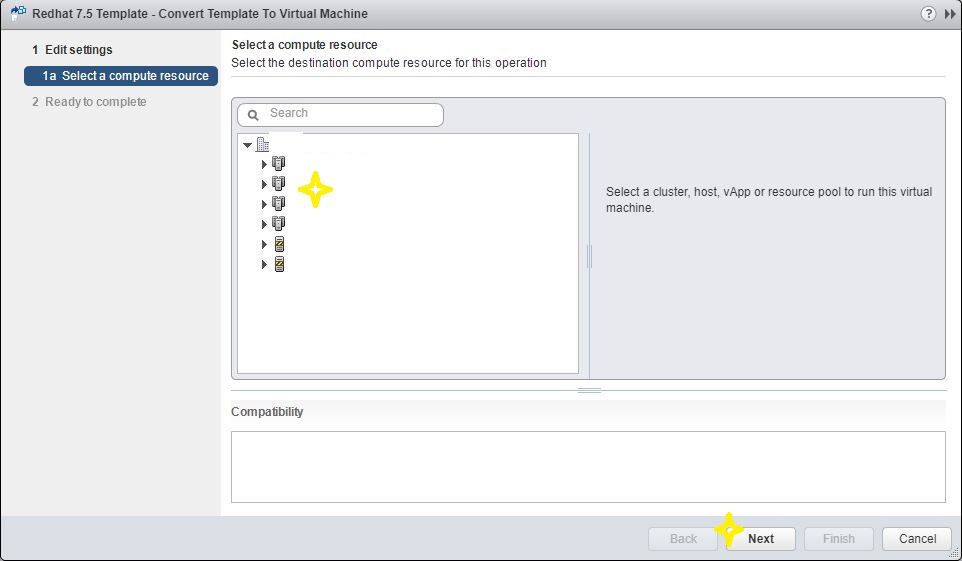
6. Optional: Convert Template to VM (to Apply Changes)
Locate the desired template > right-click > select “Convert to Virtual Machine”
Follow the Wizard