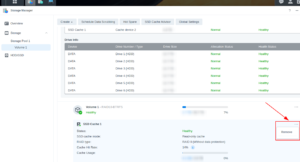
This is a quick note to myself so that I wouldn’t repeat the same mistake (due to lack of knowledge) when upgrading a Synology SSD cache on a particular volume.
Apparently, the proper procedure to change SSD caching drives would be:
- Remove the existing SSD caching:
Open Storage Manager > Storage > expand the desired volume (e.g. volume 1) > click on the three dots ‘…’ associated with the SSD Cache volume > select Remove > wait until the removal process completes
- Turn off Synology
- Physically replace the old SSD drives with new ones
- Turn Synology back on
- Assign the new caching SSDs toward the desired volumes with one of these options:
– Read-only: optimized for websites
– Read-write: optimized for databases and virtual machines
Here are some sample error messages when the above procedure has been executed out of order:
The read-write cache of Volume 1 on SYNOLOGY02 is missing. Please power off your Synology NAS first, and make sure that the SSD used by the SSD Cache is plugged in and then reboot your device.

From SYNOLOGY02
Volume 1 on SYNOLOGY02 has crashed. It is possible that more files may be corrupted if this volume is still used. Please go to Storage Manager > Storage for more information.

From SYNOLOGY02
Categories: