Posted On June 12, 2019

How To Use Putty with an AWS Private Key

kimconnect 0 comments
blog.KimConnect.com >> Virtualization >> How To Use Putty with an AWS Private Key
Step 1: convert .PEM file into a .PPK format

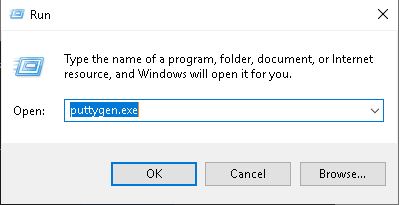
Run puttygen.exe
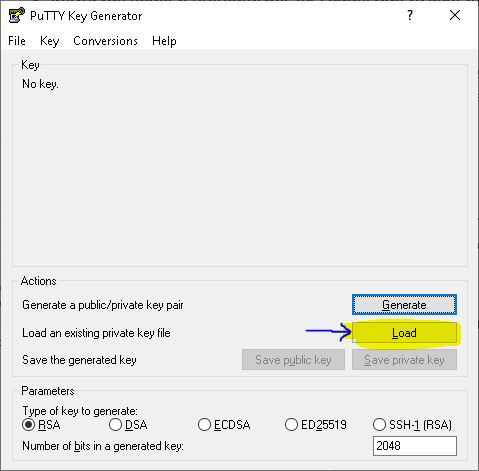
Click on Load
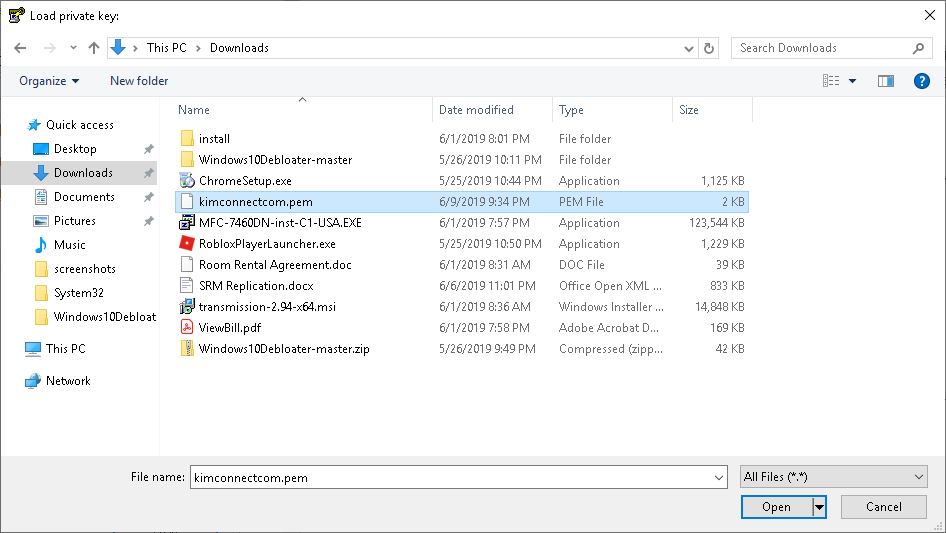
Navigate to a .PEM file as downloaded from AWS > click OK to select it
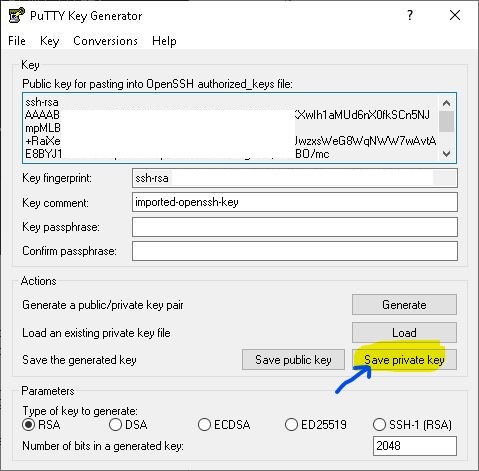
Click Save Private Key > place the resulting .PPK file onto the Desktop
Step 2: Configure putty to use the generated .PPK file

Run: putty.exe > navigate to Connection > SSH > Auth > click on Browse to import the .PPK file as generated by the previous step
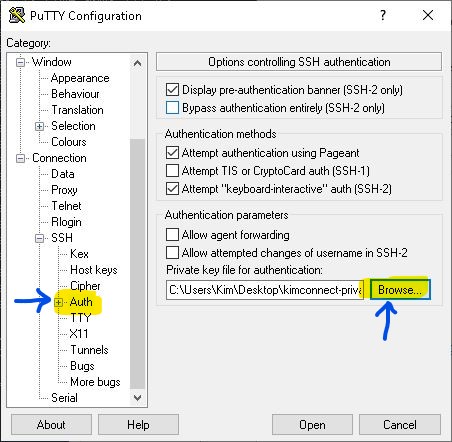
Put a check mark next to ‘Allow agent forwarding’ (important if jump boxes are used in the environment)

Select Data > set Auto-login username

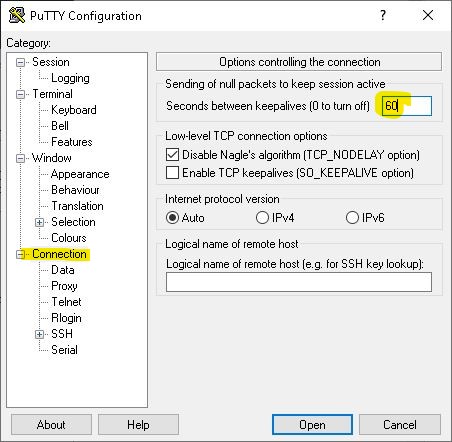
Navigate to Connection > set the keepalive packets interval to 60 [seconds]
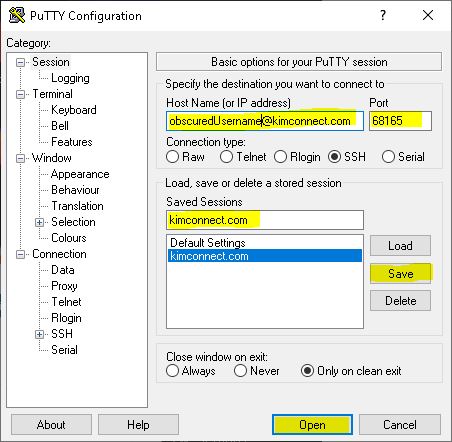
Navigate back to Session > input the connection string URL (e.g. [email protected]) > set port number >  give this setup a name > Save > Open when ready to connect
Leave a Reply

Your email address will not be published. Required fields are marked *

Related Post

Kubernetes Ingress Error 502 Upon NextCloud Upgrades

Issue: Just the other day, I've attempted to run a 'helm upgrade…' command on my…

Hyper-V Logon Failure: the user has no been granted the requested logon type at this computer (0x80070569)

Issue: When performing a live migration of a guest VM, this error occurs: '...Failed to…

Hyper-V: Attach a New Virtual Disk

$vmName='TestVm' $storageLocation='\\FILESERVER06\SHAREXOXO' $newDiskSize='100GB' $dynamic=$true function createNewDisk{ param( $vmName, $storageLocation, $newDiskSize='100GB', $dynamic=$true ) $ErrorActionPreference='stop' try{ write-host…
Other project: DragonCoin.com