Error Message:
---------------------------
Computer Name/Domain Changes
---------------------------
Changing the Primary Domain DNS name of this computer to "" failed. The name will remain "domain.ltd".
The error was:

The specified domain either does not exist or could not be contacted.
---------------------------
OK
---------------------------
Resolution:
Source: https://learn.microsoft.com/en-us/troubleshoot/windows-server/active-directory/fail-to-join-computer-to-ad-domain
- Check NETSETUP.LOG
-
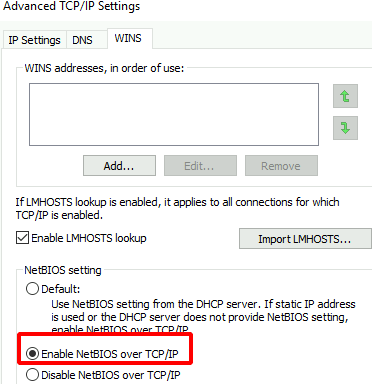
Verify that NetBIOS over TCP/IP is enabled.
- Click Start, click Run, type ncpa.cpl, and then click OK.
- In Network Connections, right-click Local Area Connection, and then click Properties.
- Click Internet Protocol Version 4 (TCP/IPv4), and then click Properties.
- In the Internet Protocol Version 4 (TCP/IPv4) Properties dialog box, click Advanced.
- On the WINS tab, verify Enable NetBIOS Over TCP/IP is enabled, and then click OK three times.
-
Verify end-to-end network connectivity over UDP port 137 over the network path connecting the client being and the helper DC serving the join operation.
-
If the error occurred in an IPv6 only environment or you require a fix to resolve the error, open a support incident with Microsoft Customer Service and Support requesting a post RTM fix for Windows 7/Windows Server 2008 R2.
-
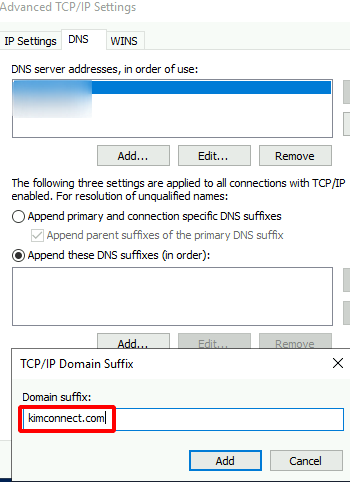
Add Domain DNS Suffix in the TCP/IP Properties.
- Click Start, click Run, type ncpa.cpl, and then click OK.
- In Network Connections, right-click Local Area Connection, and then click Properties.
- Click Internet Protocol Version 4 (TCP/IPv4), and then click Properties.
- In the Internet Protocol Version 4 (TCP/IPv4) Properties dialog box, click Advanced.
- On the DNS tab, select these DNS Suffixes, click Add, type the FQDN of the domain in the DNS Server dialog box, click Add, and then click OK three times.
Categories: