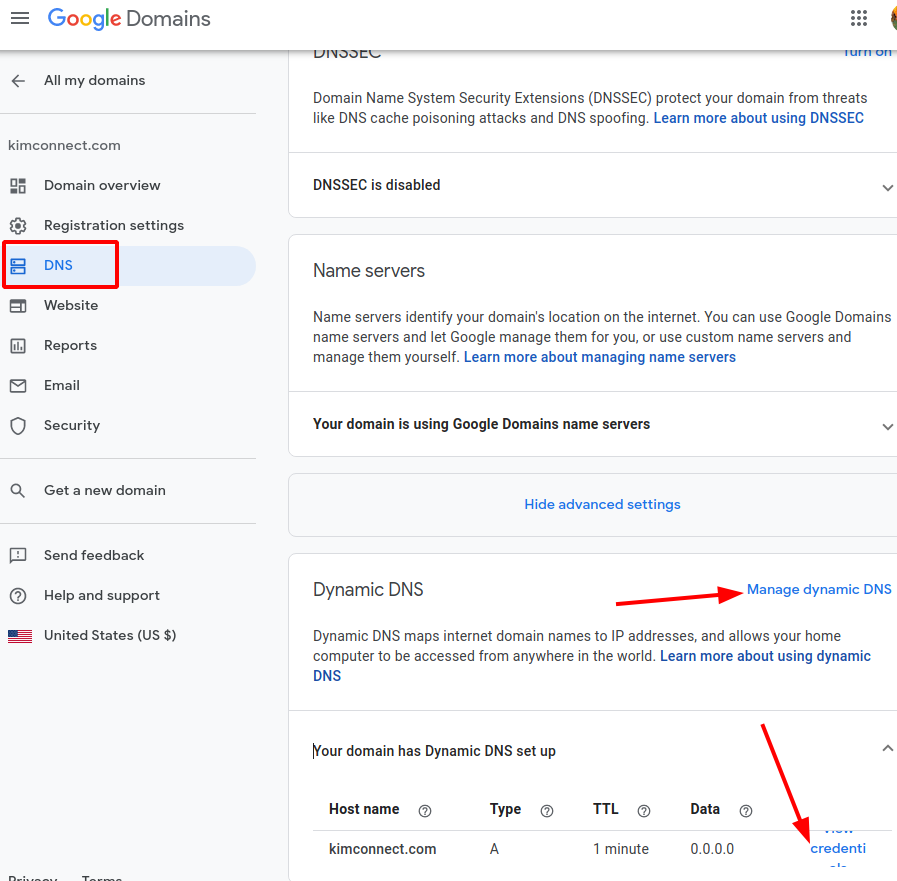
Step 1: Set up Dynamic DNS
– Access Google Domains:
– Click on the Manage button, next to your domain
– Click on DNS
– Scroll toward the bottom to click on Advanced Settings
– Click on Manage dynamic DNS
– Leave the hostname field blank, click on Save
– If this domain already has a record, click on Replace to proceed or Cancel to input a different sub-domain
– Click on the drop-down menu next to ‘Your domain has Dynamic DNS setup’
– Select View credentials to trigger a pop-up window
– Click on View to see the username and password generated for this domain
– Copy and paste the information into a notepad to be used in ‘Step 2’
– Select Close
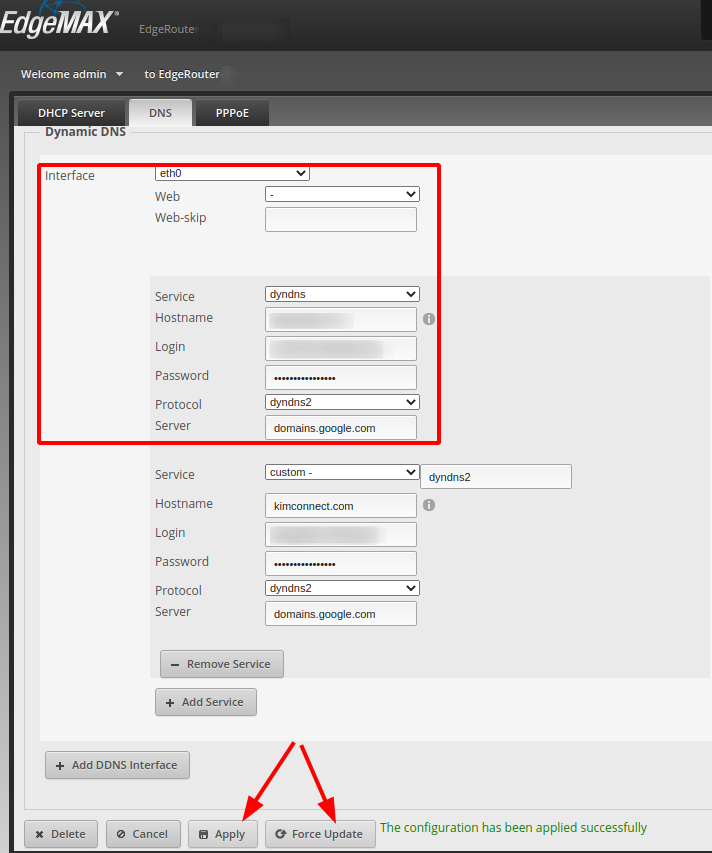
Step 2: Configure EdgeRouter with Dynamic DNS
– Access the router:
– In section Dynamic DNS, click the Add Dynamic DNS Interface button
– Set these values:
– Interface: eth0 (or WAN interface)
– Web: <leave blank>
– Web-skip: <leave blank>
– Service: dyndns
– Hostname: kimconnect.com (or the hostname that has been setup in step 1)
– Login: {username copied in step 1}
– Password: {password copied in step 1}
– Protocol: dyndns2
– Server: domains.google.com
– Click on Apply
– Click on Force Update to expect this message ‘The configuration has been applied successfully’